posts · store cupboard

Farmers Market Basil Pesto

Basil Pesto in a Jar

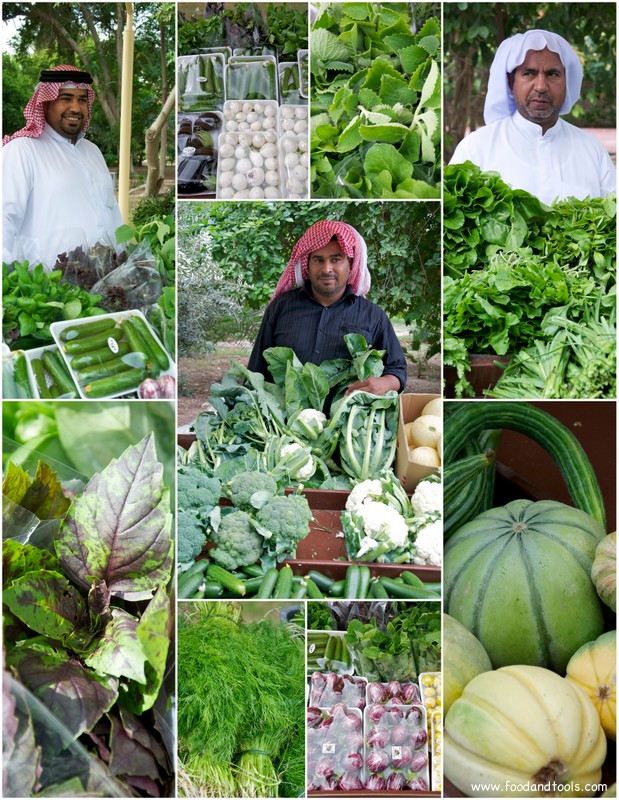
Bahrain had its First Farmers Market last week and naturally it was the first thing on my to-do list that day! Glad I did not leave it so late in the morning to visit, the farmers market was already very busy when I arrived and there was an excited buzz in the air!

Living on an Island we rely heavily on imports and local produce is very limited, although some supermarkets in Bahrain do carry a small amount! Supporting our farmers who are willing to offer us more fresh market produce is a must and I would imagine it is no easy task growing some vegetables and fruits in Bahrain’s harsh climate… although we do have beautiful weather at the moment!

Bahrain's Farmers Market

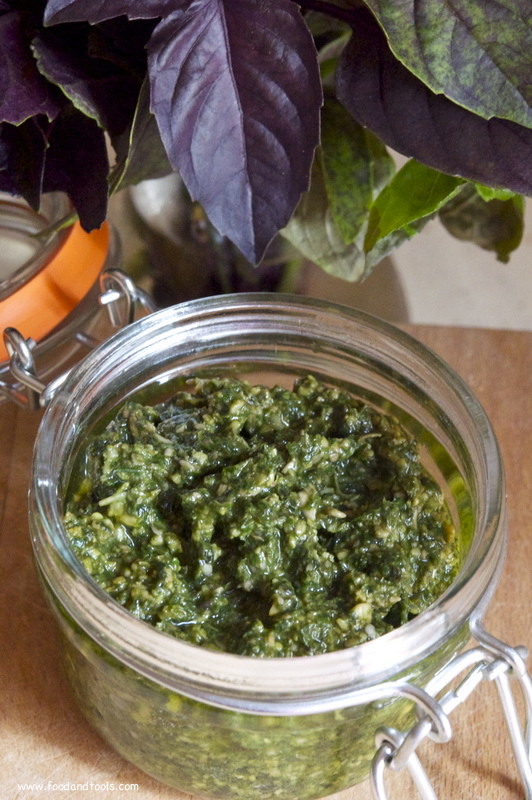
Picking up some beautiful bunches of fresh basil (purple and green), some cherry tomatoes, lettuce, small purple aubergine and cauliflower… I headed home feeling I had won a gold medal! I think I got overly excited and bought way too much basil so I decided to make up a jar of  “Farmers Market Pesto”! Making your own fresh pesto is so easy and so worth the effort, tasting so much better than anything coming from a supermarket jar!

Amy from Appetite for Discovery (thanks for letting me know about the farmers market) was also at the farmers market buying some fresh beetroot and if you love beetroot, head over to her blog for a delicious Beetroot, Walnut and Goats Cheese Salad!

Cherry tomatoes, basil, lettuce, small aubergine, cauliflower.  Balinese Prawn Curry with small aubergine and cherry tomatoes.

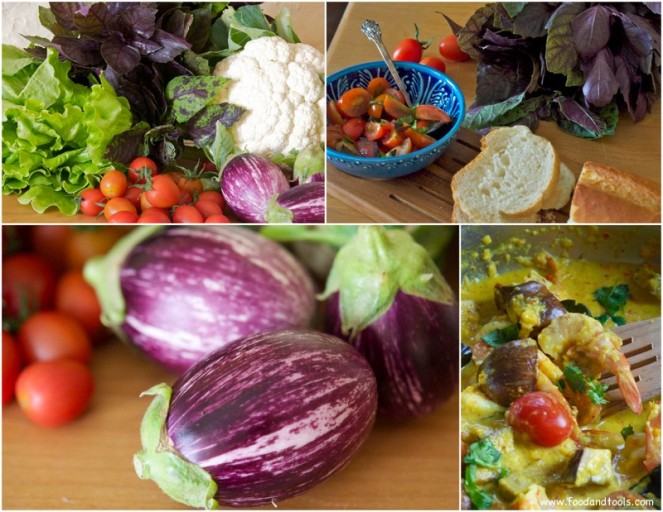
As well as making fresh Pesto I made sure none of my fresh farmers market produce was going to waste… making a very simple cherry tomato and fresh basil salad, with a pomegranate and olive oil dressing… eaten with fresh crusty bread! Added some of the small aubergine and cherry tomatoes into a Balinese Prawn Curry for a quick meal! Made a citrus salad with the cauliflower and used the lettuce in a salad with avocado and fresh pomegranate!

Purple and Green Basil. Basil Pesto in a Jar.

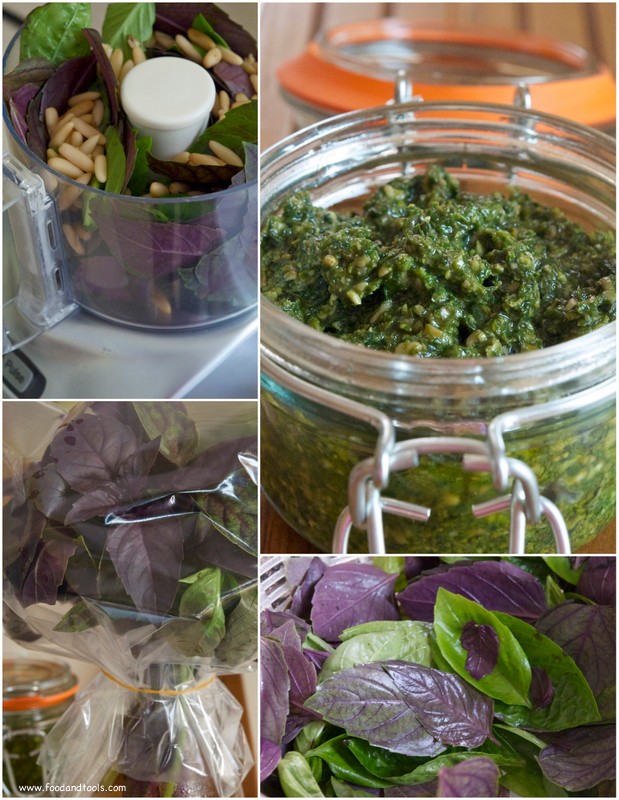
To keep fresh herbs longer store them in a glass or small vase with some water and place a plastic bag loosely over the top. Secure the bottom of the bag with a rubber band and keep in the fridge, changing the water at least once! Your herbs will stay fresh and crisp for at least four days and sometimes a little longer!

Using purple basil makes the pesto a darker shade of green but if you prefer a more vibrant green, choose green basil! Fresh pesto can be used with lots of different dishes; mix freshly made pesto with some pasta, use as a spread in toasted sandwiches, mix with vegetable salads, use in dressings, serve with grilled fish, chicken and lamb… a really handy and delicious store cupboard item to have! The recipe below made almost 3/4 cup of pesto!


Farmers Market Basil Pesto

Ingredients:

  • purple and green basil (I used 2 purple bunches and one green)
  • 1 handful of pine nuts (I prefer not to roast them)
  • about 3 to 4 tablespoons of freshly grated parmesan cheese or Pecorino Romano cheese
  • 1 large garlic clove, peeled and roughly chopped
  • 1 teaspoon of lemon juice
  • 3 to 4 tablespoons of olive oil
  • sea salt and freshly ground black pepper, to taste

How to make: Snip all the basil leaves from their stalks using scissors (discard bruised and damaged leaves) and gently wash the leaves in cold water. Using a salad spinner to remove the excess water from the leaves is really helpful, or you can pat them dry with some kitchen paper towel.

Place the basil into a blender/processor with the pine nuts, parmesan cheese, garlic and lemon juice. Blend together using the pulse button, stopping to clean down the inside of the bowl with a spatula. With the motor running drizzle in some olive oil until the pesto has achieved a nice thick creamy paste. To taste, season with some sea salt and freshly ground pepper. Place pesto into a suitable jar with a lid (clean and sterilize) and pour a thin layer of olive oil over the surface of the pesto.  Store in the fridge and use within 4 days! Pesto can also be frozen (in a suitable container) for a couple of months in the freezer!

Dont forget to visit Bahrain’s Farmers Market which will be held each Saturday from 8am to 12am in Budaiya!

baking

Lining Cake Tins for Fruit Cakes

Unbaked Fruit Cake

Around this time of year many fruit cakes are made, some baked with great success and others coming with tales of woe… sinking middles, burnt edges, over cooked, under cooked and sticking to the cake tin. As a child I learned a very important step when watching my mother measure and cut non-stick baking parchment and brown paper to line the insides of her cake tins. She would then wrap the outside of each cake tin with a collar of newspaper and tightly secure this with twine all in preparation for the yearly ritual of baking fruit cakes for Christmas.

1-2012-12-09

Fruit cakes baked for long hours need protection from the heat of an oven and correctly lined tins will turn out moist cakes, with no overly browned and dried out edges, tops and bottoms. Also, laying 3 sheets of newspaper on the rack or baking tray of an oven gives the bottom of your fruit cakes extra protection when baking. Newspaper can safely be used in an oven with fruit cakes baked at low temperatures.

However, paying attention to the temperature of an oven is also extremely important for successful baking. Over the years I have baked in many different ovens and know that some oven thermostats can vary. Using an oven thermometer will insure your cake bakes at the correct temperature and takes the guess-work out of knowing what temperature your oven might be running at.

So, if you love your fruit cakes… line your cake tins my Mama’s way and use an oven thermometer. By the way… no fruit cakes were ever harmed lining cake tins this way. Happy Baking 🙂

1-DSC_0773-001

Lining Cake Tins Essentials:

  • Good quality baking tins (still using my mothers cake tins)
  • Non-Stick Baking parchment
  • Brown Paper
  • Newspapers
  • Pencil
  • Scissors
  • Ruler
  • Paper clip (if you have no one around to hold the collar of newspaper in place while tying with twine)
  • Measuring tape
  • Twine
  • Pastry brush
  • Unsalted butter, melted

Lining a round or square cake tin:

You will need to line the inside of a round/square cake tin (sides and base) with three layers,  one layer of brown paper and two layers of non-stick baking parchment. If you do not have brown paper, use non-stick baking parchment instead.

Start by measuring (with measuring tape or string) around the outside edges of the cake tin. Using the measurement, cut a double-folded strip of non-stick baking paper, this should also be wide enough to extend 3 inches above the top of the cake tin. Fold down a 1 inch deep cuff along the length of the strip, then make diagonal cuts up to the fold line, about 3/4 inch apart. Repeat the same steps with a single layer of brown paper.

Lay a square/round cake tin on top of a double piece of nonstick baking parchment and using the cake tin as a guide draw around it. Cut out the circles/squares. Repeat the same steps with a single layer of brown paper.

Lightly brush the base and inside of the baking tin with some melted butter. Starting with the brown paper, line the inside sides of the cake tin with the brown paper strip, pressing the cut edges out at right angles and laying them flat against the base.

Lightly brush the brown paper with melted butter and line the sides of the cake tin with the double strip of non-stick baking parchment, again making sure the cut edges are lying flat against the base of the tin.

Lay one circle/square of brown paper, followed by two circles/squares of non-stick baking parchment over the base of the tin, you might need to trim them slightly so they fit snugly against the edges of the tin.

Measure and cut a double strip of newspaper to fit around the outside of the cake tin and tie securely with twine.

Do you have any tips on lining cake tins?

drinks · food + drink · posts

Hot Turkish Wintertime Drink – Salep

Exploring and wandering the wonderful streets of Istanbul, tea and coffee stops are inevitable. Recharging the batteries and soaking up the atmosphere of a bustling city steeped in history and culture. Istanbul is a busy  city all year round… literally heaving with people!  On entering one of the many cafes, and scribbled on a chalk board,  I noticed hot Salep on the menu and was told… “we make the best!” Ditched the usual Turkish Tea and ordered Salep. Who was I to argue whether it was the best, this was my first taste of this very popular Turkish wintertime drink.

A nice change from drinking a hot chocolate or a winter spiced latte, this hot thickened milky drink (the taste of semolina was the first thing that came to mind) was served with a dusting of cinnamon on top.  Although a little overly sweet I did enjoy this warming drink and found Salep quite filling.

Salep (Sahlab, Saloop,) is a nutritious starchy flour derived from the tuberous root of a certain species of Orchids. In Turkey export of pure Salep flour is apparently illegal, as over harvesting of their Orchids (Turkey known for the best Salep flour) has led to its decline. Salep is also used in the famous Turkish Dondurma ice cream.

Throughout the Middle East, Mediterranean, Europe and Asia drinks made using Salep were enjoyed for centuries and touted as an aphrodisiac (a botanical Viagra) and a restorative for the young and old. London’s industrial era served many a labourer Saloop (flour derived from British Isle Orchids ) in the early morning hours, a hearty drink flavoured with orange blossom and rose-water to kick-start a long and hard-working day.

Pure Salep flour is expensive and many use cornflour as a substitute or use a mix of both (both have thickening qualities) and say it tastes like the real thing! Some say Salep flour has little or no taste and others say it has a slightly floral taste. Can’t say I noted a floral taste when drinking Salep as the cinnamon was the dominant flavor. Maybe some Salep drinking experts can enlighten me on the subject.

Purchased a box of flavoured salep/sahlab at a local supermarket which contained the ingredients; sahlab, sugar, mastic, rose and orange blossom flavour to try… it turned out way too sweet and overly perfumed for my liking.

This is my way of making a faux style Salep (which tastes just as good) using glutinous rice flour as a thickener, preferring the creamy results it gave over the cornflour.  However, cornflour may be used and here is another recipe and other information on Salep. Camping season has begun in Bahrain and the desert can turn very cold… so why not treat family and friends to this warming winter time drink.

1-DSC_0619-001

Winter Warming Hot Salep

Ingredients:

  • 8 level teaspoons of glutinous rice flour (sweet rice) (found at asian supermarkets)
  • 1 litre of full-fat or low-fat milk
  • sugar or honey, to taste

Flavour Salep with:

1/4 teaspoon orange blossom water OR rose-water, per cup

OR 

a light dusting of cinnamon powder

garnish with some finely chopped pistachio, if desired.

How to make: Add the glutinous rice flour into a medium saucepan, using a whisk, slowly mix in the milk until smooth. Bring the milk mixture to a boil, stirring constantly with a whisk or wooden spoon. Reduce heat and simmer gently for about 3 minutes to thicken and cook through, stirring often. Sweeten with sugar to taste, add desired flavouring and pour into cups, serve hot. Alternatively, pour the unflavoured Salep into cups and let each person flavour their own. Serves 4

Have you tried Salep before? Do you have a favourite wintertime drink?