food + drink · store cupboard

Creamy Coconut Milk – Homemade

Coconut Milk-0054-2If you have subscribed to Food and Tools you might be feeling a sense of “Déjà Vu”…  I’ve seen this post before! Yes you have! I never knew blog posts could disappear and I have absolutely no idea how that happened. It did bring to my attention that some older posts have some broken links and missing photographs, so it seems I have a little housework to do. Maybe it happened when I switched themes! Thankfully I had most of this post saved… always backup EVERYTHING!

This post was also part of the February photography challenge over at Simone’s blog JungleFrog Cooking and the theme, Homemade… making a homemade recipe from scratch. My first introduction to fresh coconut milk was in Thailand some years back and seeing how easy the process of extracting fresh coconut milk from grated coconut was, encouraged me to make coconut milk at home. It’s so easy to grab a tin of coconut milk (maybe not so easy to find a good quality brand) from the store cupboard, but there is a great sense of culinary pride when you make your own coconut milk… give it a try.

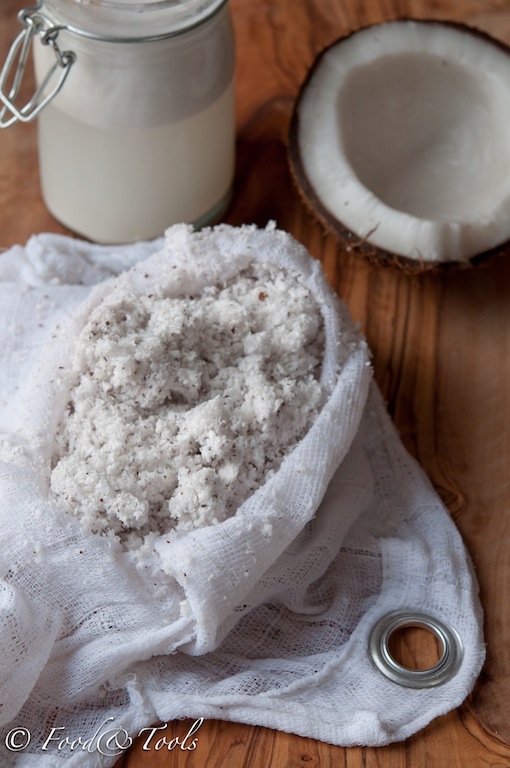
Making delicious creamy coconut milk at home is easy but cracking the hard shell of the coconut might be the most difficult part and result in a few painful mishaps!  If you have a supermarket (Lulu and Geant in Riffa) that grates fresh coconut it might be a good idea to avail of this service. Homemade coconut milk means no additives, stabilizers or salt and it’s dairy free. When selecting a coconut, gentle shake and listen for the sound of liquid sloshing around inside, no sound or very little means the coconut has cracks, leakages or old and dried out.

Coconut reminds me of Halloween and as a child I have memories of myself desperately trying to pry the coconut flesh from the shell with a dinner knife, stabbing myself a few times in the process. Placing a coconut (cracked and water drained) in a preheated oven on moderate heat for about 15 minutes helps loosen the coconut flesh, making it easier to pry away from the shell… a tip I could have done with years ago! Although you can complete the process of making coconut milk by hand, some kitchen tools make it easier. To grate the coconut flesh use an electric coconut scraper, the fine side of a grating blade on a food processor or a manual grater. Using a blender to blend the grated coconut flesh with hot water  helps extract more of the oils, resulting in a creamier milk with more flavor. You can also soak the grated coconut flesh in the hot water and when cool, massage the coconut flesh with your hands for about three minutes before straining. Using a cheesecloth bag or nut milk bag makes it easier to strain and squeeze the coconut milk from the grated coconut flesh.Home-made Coconut Milk

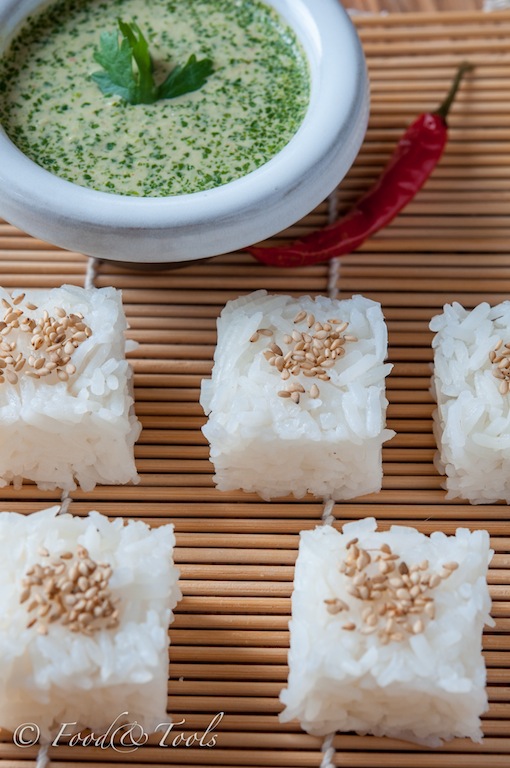
On standing, the strained coconut milk separates and the coconut cream rises to the top. If you only need the coconut cream for a particular recipe, leave the coconut milk in the refrigerator overnight. The coconut cream on top will have completely solidified (will soften again at room temperature), making it easy to remove, leaving behind a light coconut milk.  When making coconut milk you can experiment with the grated coconut and water ratios to make a consistency you like. Use the coconut milk or cream to whip up some tasty coconut desserts like a coconut and date dipping sauce or  chilli coconut broth with caramelized fresh pineapple. Use coconut milk or cream in curries, sauces, soups, smoothies, custards, ice creams, rice dishes, bread and cake making… the list is quite endless. Grated coconut can be frozen so its handy to keep a few bags in the freezer.

Coconut Mlk-LRE-0179

Creamy Coconut Milk

Ingredients:

  • 1 coconut ( 260g when grated)
  • hot water (used 260g of hot water)

Note: Depending on how many coconuts you use, weigh the grated coconut flesh and use the same weight in water. Based on the above weights I extracted 350ml of creamy coconut milk. On leaving the coconut milk to separate and solidify, the coconut cream (when removed) weighed 120g, leaving behind 230ml of light coconut milk

How to make: If using a whole coconut; Preheat the oven to moderate temperature. Holding the coconut securely in one hand, held over a sink ( which will catch the water), whack the coconut along the middle with the back-end of a heavy chefs knife or cleaver. You may have to repeat this step a few more times to break the coconut in half. Place the coconut into the oven for fifteen minutes, remove from the oven and cool before handling. Pry the flesh away from the shell using a knife and grated the coconut flesh.

Place the grated coconut flesh and hot water into a blender, blend for a minute, scrape down the sides and blend again. Pour the coconut mixture into a straining bag or nut milk bag placed over a bowl and when the mixture is cool enough to handle, twist the straining bag and squeeze out as much coconut milk as possible. Transfer the coconut milk to a suitable container and refrigerate until need. Coconut milk can be stored in the fridge for 2 days.

Note: You can repeat the process a second time, mixing the coconut flesh with more hot water, blending and straining again which results in a watery coconut milk with not as much flavor. Do not mix both together as it will dilute the taste of the creamier coconut milk… unless it’s a consistency and taste you prefer!

Once the grated coconut is squeezed of all its goodness it is quite tasteless, especially after a second pressing, I usually discard it.

appetizers · food + drink · posts

Rice Cubes with Coriander Chilli Dipping Sauce

Rice Cube-0040Trying to figure out the Rubik’s cube was always a puzzle and one I never quite managed to solve, however, looking at my new culinary gadget… this bright red cube looked like something I could master. When family and friends know you love kitchen gadgets, it’s inevitable you will receive them as gifts. My lovely daughter thought the Rice Cube looked really cool (I believe the shop had a video demo running in the background) and decided to buy me one… or maybe it was a big hint to make sushi.

Invented by an Australian cook Ross Patten to impress the judges at a Master Chef audition, the Rice Cube is used to mold rice and other soft foods into bite-sized portions. I love stylish presentation and am definitely sold on the idea of tasty square morsels of rice. Information about the Rice Cube is found on the official website, which has recipes and ideas if you plan on buying one.

Rice Cube-0021The first recipe that came to mind was an appetizer I make for casual entertaining, cooked rice rolled into balls and served with a coriander chilli dipping sauce. Jasmine rice is naturally sticky and when compressed and molded, holds together without falling apart. Using the Rice Cube with this recipe seemed a good place to start.

Working with the Rice Cube felt a little awkward at first but I soon got into the rhythm after molding a few squares which looked so neat. This could be the start of a new obsession… a square one!Rice Cube-0053Some notes: Use a good quality peanut butter when making the dipping sauce, I used a peanut butter (made by Neshat) that I had bought from a farmers market in Bahrain, which tastes so good. When cooking the rice add salt to the water, otherwise the rice will taste bland. The rice cubes or rice balls and dipping sauce can be made a couple of hours in advance, covered and stored in the refrigerator. If you are not a fan of fish sauce season the dipping sauce with some sea salt instead. Grilled prawns also taste delicious with this dipping sauce.

 Rice Cubes with Coriander Chilli Dipping Sauce

Ingredients:

  • 4 cups of freshly cooked Jasmine rice (makes about 20 rice cubes)
  • 2 cups chopped coriander, (leaves, stalks and roots)
  • 2 small garlic cloves, peeled and sliced
  • 1 or 2 small red chilli, deseeded and roughly chopped
  • 4 tablespoons of roughly chopped spring onion (green part)
  • 1/4 teaspoon lime zest
  • 2 tablespoons lime juice
  • 100ml creamy coconut (homemade or canned)
  • 2 tablespoons smooth peanut butter
  • 1 teaspoon of fish sauce (approximately)
  • toasted sesame seeds, for garnish

How to make: If using the Rice Cube just follow the instructions. Molding by hand; when the cooked rice is cool enough to handle, gently compress small bite-sized portions of rice with your hand and roll into a ball, you will need to dampen you hands with a little water when doing this. Keep the molded rice covered at all time otherwise it begins to dry out. Garnish the rice squares or balls with the sesame seeds before serving.

For the dipping sauce, add the coriander, garlic, chilli, spring onion, lime zest, lime juice, coconut milk and peanut butter into a food processor or blender. Process all the ingredients together until smooth. Pour into a suitable container and season with fish sauce to taste. Cover and store in the refrigerator until needed.

Keep an eye out for more square recipes 🙂

food + drink · mains · posts

Miso Marinated Salmon with Green Salad

Miso Salmon-0487Browsing through The Perfect 10 Cookbook’s (a supplement of Woman This Month magazine) recipes from around the world, “Japanese” and “Miso” caught my attention and immediately I found myself craving that pleasant savoury flavour, called Umami… our 5th sense of taste. Japanese is such a feel good food, even hearing and saying the words tempura, sukiyaki, miso, sashimi, sushi… makes me hungry!

Buying Miso can be a little confusing as the paste varies in colour, texture, flavour, sweetness and saltiness! Miso is a naturally fermented paste and is a basic flavouring used in Japanese cooking; produced by cooking soybean, rice or barley, injecting with a mold, mixing with water and salt, miso is then aged in kegs… some up to three years! When I think about miso as a condiment it opens up many culinary possibilities when adding miso to sauces, soups, broths, dips, marinades and dressings, all of which can be used with vegetables, meat, chicken, duck and fish.

Miso Salmon-0507From as far back as I can remember I have always loved the taste of Salmon. This oily fish is so versatile and works with many flavours. I used a dark soybean miso (Hatcho) with the Salmon, but it is quite acceptable to use a lighter sweeter miso. As miso pastes vary, tasting miso straight from its packet is a good way of gauging its flavour and saltiness before using with recipes. Use a smooth miso paste for marinating. Miso confused… then hop over to The Just Hungry blog which has some great information on miso.

Miso Salmon-0492Once the fish has marinated for 24 hours, the rest is quick and easy. For a more substantial meal, serve this dish with steamed Japanese rice or udon noodles. With the healthy omega and the satisfying umami, this dish is sure to please.

Miso Marinated Fish with Green Salad

This recipe is adapted from the Perfect Ten Cookbook, a supplement of Woman this Month magazine, recipe by James Claire.

Ingredients:

  • 2 tablespoons of Japanese cooking sake
  • 100ml mirin
  • 100g of hatcho miso paste (or your own preference)
  • 2 teaspoons honey
  • 4 salmon fillets (or other firm white fish) (each weighing 150g to 175g)

for the salad and dressing

  • 1 head of lolla rossa lettuce, torn into bits sized pieces
  • 3  medium cucumber, seeds scraped out, thinly sliced
  • 3 spring onions, thinly sliced
  • 2 tablespoons white wine vinegar
  • 2 tablespoons mirin
  • 1 tablespoons sesame oil
  • sea salt, to taste
  • toasted sesame seeds, for garnish

How to make: For the marinade, pour the sake and mirin into a small saucepan, bring to a boil, reduce heat and simmer for about 30 seconds. Remove for the heat and gradually whisk in the miso paste until you have a smooth mixture. Mix in the honey. Leave the marinade to cool. Slather the miso marinade all over the fish fillets. Cover the fish and leave to marinate in the fridge for 24 hours.

Heat a ridged grill pan to medium-high heat. Brush the ridges of the grill pan with vegetable oil before placing the fish on to cook, otherwise the fish will stick. Place the fish top side down and leave the fish undisturbed for about 3 minutes or until you make the grill marks. Turn the fish over, reduce the heat to medium and cook for a further 5 minutes or until you have cooked to the desired doneness.

In a small dish whisk the white wine vinegar, mirin and sesame oil together, season with salt.  Toss the dressing with the salad and scatter over the sesame seeds just before serving. Serves 4.

Note: The fish is best marinated for 24 hours but you could marinate the fish overnight if you were short on time. You can use a normal fry-pan instead of the ridged grill pan or cook the fish under a grill if preferred.